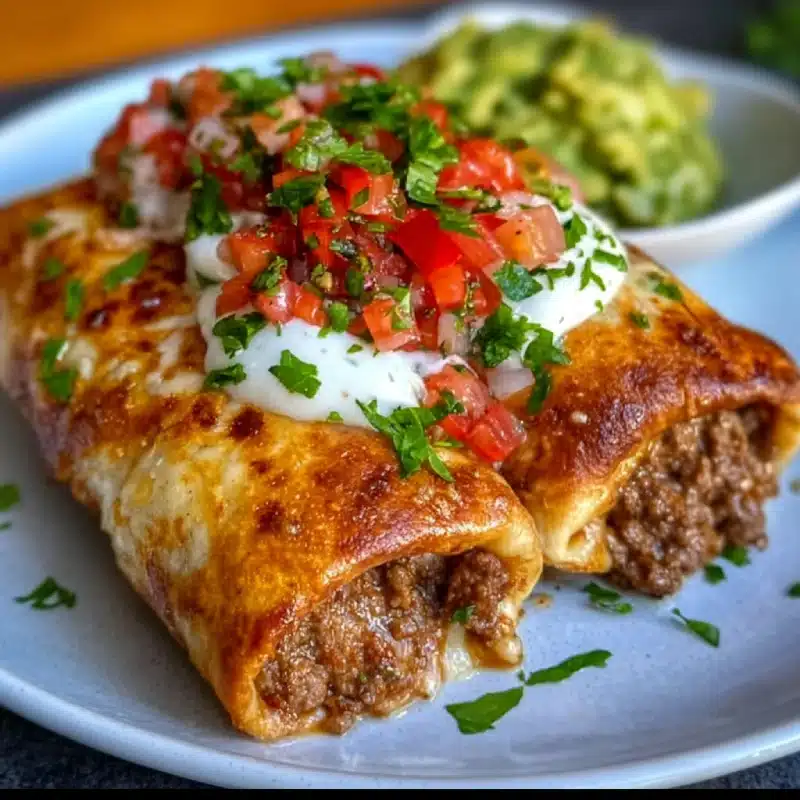
Introduction to Beef and Cheese Chimichangas
Welcome to the world of Beef and Cheese Chimichangas, where crispy tortillas meet savory goodness! As a busy mom, I know how challenging it can be to whip up something delicious after a long day. These chimichangas are not just a quick solution; they’re a delightful way to impress your loved ones. Imagine the joy on their faces as they bite into that crispy exterior, revealing a warm, cheesy filling. Trust me, this recipe will become a family favorite, perfect for those hectic weeknights or cozy weekends. Let’s dive into this culinary adventure together!
Why You’ll Love This Beef and Cheese Chimichangas
These Beef and Cheese Chimichangas are a lifesaver for busy days! They come together in just 30 minutes, making them perfect for a quick weeknight dinner. The crispy, golden tortillas are filled with a mouthwatering blend of seasoned beef and melted cheese, creating a flavor explosion in every bite. Plus, they’re versatile enough to please even the pickiest eaters in your family. What’s not to love?
Ingredients for Beef and Cheese Chimichangas
Gathering the right ingredients is the first step to creating these delicious Beef and Cheese Chimichangas. Here’s what you’ll need:
- Ground Beef: The star of the show! Choose lean ground beef for a healthier option, or go for a bit more fat for extra flavor.
- Shredded Cheese: Cheddar or a Mexican blend works beautifully. The gooey cheese melts perfectly, adding richness to each bite.
- Flour Tortillas: Large tortillas are essential for wrapping up the filling. You can also use whole wheat for a healthier twist.
- Onion: Chopped onion adds sweetness and depth to the beef mixture. You can substitute with green onions for a milder flavor.
- Garlic: Minced garlic brings a fragrant aroma and enhances the overall taste. Fresh garlic is best, but garlic powder can work in a pinch.
- Chili Powder: This spice adds a warm kick. Adjust the amount based on your family’s heat tolerance.
- Cumin: A must-have for that authentic Mexican flavor. It adds earthiness and warmth to the dish.
- Salt and Pepper: Essential for seasoning. Don’t skip these; they elevate the flavors of the filling.
- Oil for Frying: Choose a neutral oil like vegetable or canola for frying. If you prefer a healthier option, consider baking the chimichangas instead.
Feel free to get creative with your ingredients! Adding beans or veggies can boost nutrition and flavor, making these chimichangas even more delightful.
How to Make Beef and Cheese Chimichangas
Now that we have our ingredients ready, let’s dive into the fun part—making these Beef and Cheese Chimichangas! Follow these simple steps, and you’ll have a delicious meal in no time.
Step 1: Cook the Ground Beef
Start by heating a skillet over medium heat. Add the ground beef and cook it until it’s browned. This usually takes about 5-7 minutes. Make sure to break it up with a spatula as it cooks. Once it’s nice and brown, drain any excess fat. This keeps your chimichangas from being too greasy!
Step 2: Sauté the Vegetables
Next, toss in the chopped onion and minced garlic. Sauté them with the beef for about 3-4 minutes until the onion is soft and translucent. The aroma will be heavenly! This step adds a wonderful depth of flavor to your filling.
Step 3: Season the Mixture
Now it’s time to spice things up! Stir in the chili powder, cumin, salt, and pepper. Mix everything well and let it cook for another minute. This is where the magic happens, as the spices meld together, creating a savory filling that will make your taste buds dance!
Step 4: Prepare the Tortillas
Take your large flour tortillas and lay them flat on a clean surface. Spoon a generous portion of the beef mixture in the center of each tortilla. Don’t be shy—this is where the flavor lives! Then, sprinkle a handful of shredded cheese on top. It’s like a warm hug for your taste buds!
Step 5: Fry the Chimichangas
Now, let’s get frying! Heat oil in a deep pan over medium-high heat. You want enough oil to submerge the chimichangas halfway. Once the oil is hot, carefully fold the sides of each tortilla over the filling and roll them up tightly. Fry them in batches until they’re golden brown and crispy, about 3-4 minutes per side. Use tongs to turn them gently, ensuring they cook evenly.
Step 6: Serve and Enjoy
Once they’re perfectly crispy, remove the chimichangas from the oil and let them drain on paper towels. Serve them hot with your favorite toppings like salsa, guacamole, or sour cream. Trust me, the first bite will be a flavor explosion that you won’t forget!
Tips for Success
- Make sure your oil is hot enough before frying; this ensures a crispy texture.
- Don’t overfill the tortillas; a little filling goes a long way!
- For extra flavor, let the beef mixture cool slightly before filling the tortillas.
- Experiment with different cheeses for a unique twist on flavor.
- Keep an eye on the chimichangas while frying to prevent burning.
Equipment Needed
- Skillet: A non-stick skillet works best, but any frying pan will do.
- Spatula: Use a sturdy spatula for flipping the beef and chimichangas.
- Deep Pan: A deep frying pan or Dutch oven is ideal for frying.
- Tongs: Handy for turning the chimichangas safely in hot oil.
- Paper Towels: Essential for draining excess oil after frying.
Variations
- Vegetarian Option: Substitute the ground beef with black beans or lentils for a hearty, meatless version.
- Spicy Kick: Add diced jalapeños or a splash of hot sauce to the beef mixture for an extra layer of heat.
- Cheesy Delight: Experiment with different cheeses like pepper jack or queso blanco for a unique flavor profile.
- Healthier Twist: Bake the chimichangas instead of frying them. Brush with a little olive oil and bake at 400°F until golden.
- Loaded Chimichangas: Mix in some sautéed bell peppers or corn for added texture and flavor.
Serving Suggestions
- Sides: Pair your chimichangas with a fresh salad or Mexican rice for a complete meal.
- Drinks: Serve with a refreshing margarita or iced tea to complement the flavors.
- Presentation: Garnish with chopped cilantro and lime wedges for a pop of color and freshness.
- Dipping Sauces: Offer a variety of dips like salsa, guacamole, or sour cream for added enjoyment.
FAQs about Beef and Cheese Chimichangas
Can I make Beef and Cheese Chimichangas ahead of time?
Absolutely! You can prepare the filling in advance and store it in the fridge. Just assemble and fry the chimichangas when you’re ready to enjoy them. This makes for a quick dinner solution on busy nights!
What can I use instead of ground beef?
If you’re looking for alternatives, ground turkey or chicken works well. For a vegetarian option, try black beans or lentils. Both options will still deliver delicious flavor in your Beef and Cheese Chimichangas!
How do I store leftover chimichangas?
Store any leftovers in an airtight container in the fridge for up to three days. To reheat, pop them in the oven for a few minutes to regain that crispy texture. You’ll love how they taste even the next day!
Can I bake the chimichangas instead of frying them?
Yes, you can! For a healthier version, brush the chimichangas with olive oil and bake them at 400°F until golden brown. They’ll still be delicious, just with a different texture!
What toppings go well with Beef and Cheese Chimichangas?
Get creative with your toppings! Fresh salsa, guacamole, sour cream, or even a sprinkle of fresh cilantro can elevate your chimichangas. Each bite will be a burst of flavor!
Final Thoughts
Making Beef and Cheese Chimichangas is more than just cooking; it’s about creating joyful moments around the dinner table. The crispy, golden tortillas filled with savory beef and melted cheese are sure to bring smiles to your family’s faces. I love how this recipe is not only quick and easy but also allows for creativity with flavors and toppings. Whether it’s a busy weeknight or a cozy weekend gathering, these chimichangas are a delightful treat. So roll up your sleeves, gather your loved ones, and enjoy the deliciousness that awaits in every bite!

