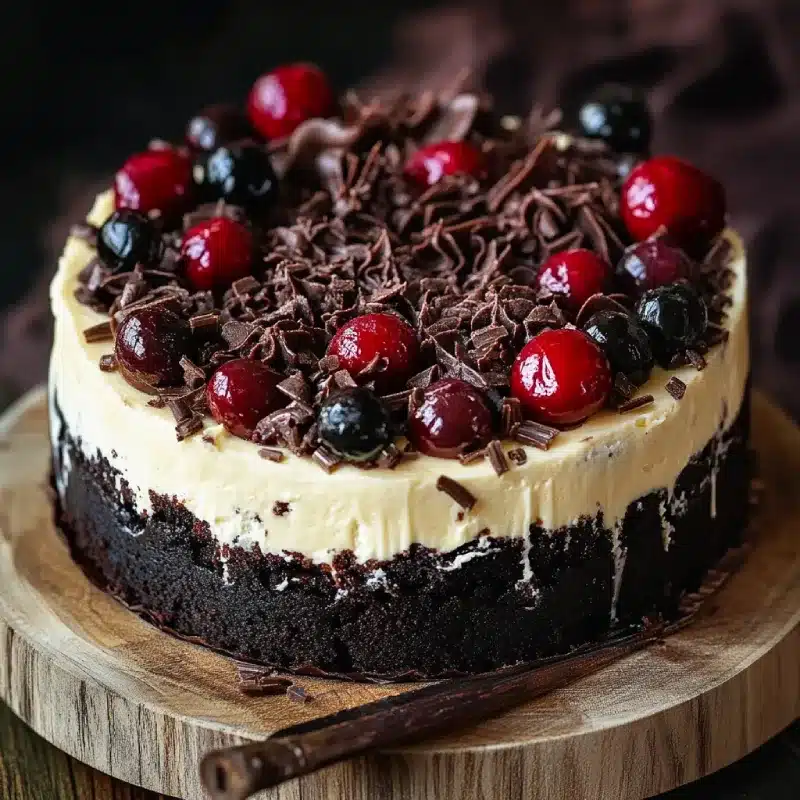
Indulge in this rich and creamy Black Forest Cheesecake that perfectly combines the classic flavors of chocolate and cherries. This dessert is a showstopper for any celebration or a delightful sweet treat to enjoy at home. The smooth cheesecake filling, loaded with juicy cherries and decadent dark chocolate, rests on a crunchy chocolate biscuit crust — an irresistible combination that will satisfy any sweet tooth.
Ingredients You’ll Need
To create this luscious Black Forest Cheesecake, gather the following ingredients:
- 200g chocolate biscuits
- 100g butter, melted
- 500g cream cheese
- 150g sugar
- 3 eggs
- 100g dark chocolate, melted
- 200g cherries, pitted
- Whipped cream, for topping
These ingredients are commonly found in grocery stores and will yield a beautiful cheesecake that serves about 8-10 people.
Step-by-Step Instructions
Step 1 – Prepare the Crust
Preheat your oven to 160°C (320°F). Begin by crushing the chocolate biscuits into fine crumbs. You can do this by placing them in a plastic bag and using a rolling pin or by pulsing them in a food processor. Mix the biscuit crumbs thoroughly with the melted butter until well combined. Press this mixture firmly into the bottom of a springform pan to form an even crust. Set aside while preparing the filling.
Step 2 – Make the Cheesecake Filling
In a large bowl, beat the cream cheese and sugar until smooth and creamy, free of lumps. Add the eggs one at a time, mixing thoroughly after each addition to create a silky texture. Gently stir in the melted dark chocolate until fully incorporated. Carefully fold in the pitted cherries, distributing them evenly through the batter.
Step 3 – Bake the Cheesecake
Pour the cheesecake mixture over the prepared crust in the springform pan. Smooth the top with a spatula to create an even surface. Bake the cheesecake at 160°C (320°F) for 50-60 minutes or until the edges are set but the center still has a slight wobble. This ensures a creamy texture once cooled.
Step 4 – Cool and Chill
Once baked, remove the cheesecake from the oven and allow it to cool completely at room temperature. Then, cover and refrigerate for at least 4 hours or overnight to let it set perfectly.
Step 5 – Add the Finishing Touches
Before serving, top your Black Forest Cheesecake with a generous layer of whipped cream and decorate with extra cherries for a beautiful presentation and an extra burst of flavor.
Tips for the Best Black Forest Cheesecake
- Use fresh or high-quality frozen cherries for the best taste and texture.
- Melt the chocolate gently using a double boiler to avoid burning.
- Do not overmix the batter to prevent air bubbles that cause cracking.
- To avoid cracks on the surface, bake the cheesecake in a water bath if possible.
- Let the cheesecake chill long enough to fully set for cleaner slices.
Serving Suggestions
This cheesecake pairs wonderfully with:
- A drizzle of chocolate sauce
- A scoop of vanilla ice cream
- Freshly brewed coffee or espresso
Perfect for birthdays, holidays, or whenever you want to impress guests with a homemade dessert.
How to Store Black Forest Cheesecake
Store leftover cheesecake in an airtight container in the refrigerator. It will keep well for up to 4 days. For longer storage, wrap it tightly in plastic wrap and freeze for up to 1 month. Thaw in the refrigerator before serving.
Frequently Asked Questions
Can I use canned cherries instead of fresh?
Yes, but drain them well to avoid excess moisture affecting the cheesecake texture.
Can I substitute dark chocolate with milk chocolate?
You can, but dark chocolate provides a richer, more balanced flavor with the cherries.
How do I prevent the cheesecake from cracking?
Bake it gently at a low temperature and avoid overmixing the batter. Using a water bath can also help.
Final Thoughts
The Black Forest Cheesecake is a delightful dessert that combines the best of chocolate and cherry flavors in a creamy, smooth texture atop a crunchy crust. Its impressive appearance and decadent taste make it an ideal choice for any special occasion or an indulgent treat. With simple ingredients and straightforward steps, you can easily make this classic dessert at home.
If you enjoyed this recipe, visit our website for more delicious and easy-to-make desserts that will wow your family and friends.

