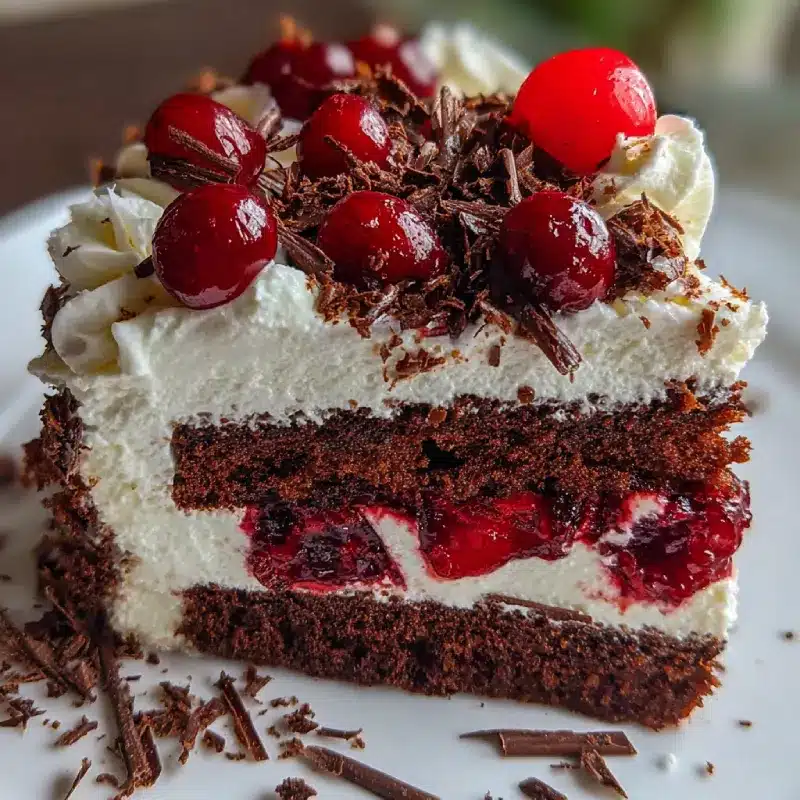
Introduction to Black Forest Cream Cake Recipe
Welcome to the world of indulgence with my Black Forest Cream Cake Recipe! If you’re like me, juggling a busy life while trying to whip up something special can feel overwhelming. This cake is your answer! It’s rich, decadent, and perfect for impressing loved ones or treating yourself after a long day. Imagine layers of moist chocolate sponge, fluffy whipped cream, and luscious cherries coming together in a delightful harmony. Trust me, this cake will not only satisfy your sweet tooth but also bring smiles to the faces of those you love. Let’s dive in!
Why You’ll Love This Black Forest Cream Cake Recipe
This Black Forest Cream Cake Recipe is a true gem for busy moms and professionals alike. It’s not just about the taste—though, oh my, it’s divine! The ease of preparation makes it a breeze to whip up, even on hectic days. Plus, the combination of chocolate, cream, and cherries creates a flavor explosion that will leave everyone asking for seconds. You’ll love how quickly it comes together, making it perfect for any occasion!
Ingredients for Black Forest Cream Cake Recipe
Gathering the right ingredients is the first step to creating this delightful Black Forest Cream Cake. Here’s what you’ll need:
- All-purpose flour: The backbone of your cake, providing structure and texture.
- Granulated sugar: Sweetens the cake and helps create a moist crumb.
- Unsweetened cocoa powder: Adds rich chocolate flavor; dark cocoa can intensify this.
- Baking powder and baking soda: These leavening agents help the cake rise beautifully.
- Salt: Enhances the flavors and balances the sweetness.
- Large eggs: Bind the ingredients together and add moisture.
- Whole milk: Contributes to the cake’s richness and tenderness.
- Vegetable oil: Keeps the cake moist; you can substitute with melted butter for a richer taste.
- Vanilla extract: A must-have for that warm, comforting flavor.
- Boiling water: This secret ingredient helps to create a smooth batter and enhances the chocolate flavor.
- Heavy whipping cream: Essential for the luscious frosting that makes this cake so special.
- Powdered sugar: Sweetens the whipped cream and helps it hold its shape.
- Morello cherries: These tart cherries add a burst of flavor and a beautiful pop of color.
- Chocolate shavings: For garnishing, adding a touch of elegance and extra chocolatey goodness.
How to Make Black Forest Cream Cake Recipe
Step 1: Preheat and Prepare
First things first, let’s get that oven preheating to 350°F (175°C). While it warms up, grab two 9-inch round cake pans. Grease them with butter or cooking spray, then dust with flour. This will help your cakes slide out easily once they’re baked. Trust me, there’s nothing worse than a cake that sticks!
Step 2: Mix Dry Ingredients
In a large mixing bowl, combine the all-purpose flour, granulated sugar, unsweetened cocoa powder, baking powder, baking soda, and salt. Whisk them together until they’re well blended. This step is crucial because it ensures that the leavening agents are evenly distributed, giving your cake that perfect rise.
Step 3: Combine Wet Ingredients
Now, it’s time to add the wet ingredients. Crack in the large eggs, pour in the whole milk, vegetable oil, and vanilla extract. Mix everything together until it’s smooth and well combined. The batter should be thick but pourable. Don’t worry if it looks a bit lumpy; it’ll come together beautifully!
Step 4: Add Boiling Water
Here’s the magic trick: carefully stir in one cup of boiling water. This step is essential for achieving that moist, tender crumb. The hot water helps to bloom the cocoa powder, enhancing the chocolate flavor. Your batter will be quite thin, but that’s exactly what you want!
Step 5: Bake the Cakes
Pour the batter evenly into your prepared cake pans. Pop them into the preheated oven and bake for 30-35 minutes. To check for doneness, insert a toothpick into the center of the cakes. If it comes out clean or with just a few crumbs, they’re ready to come out!
Step 6: Cool the Cakes
Once baked, let the cakes cool in the pans for about 10 minutes. Then, carefully transfer them to wire racks to cool completely. This step is crucial! If you frost them while they’re still warm, the whipped cream will melt, and we don’t want that delicious cream sliding off!
Step 7: Whip the Cream
While the cakes cool, let’s whip up that luscious frosting! In a mixing bowl, pour in the heavy whipping cream and add the powdered sugar. Using a hand mixer or stand mixer, whip the cream until stiff peaks form. This means when you lift the beaters, the cream holds its shape. It’s like a fluffy cloud of goodness!
Step 8: Layer the Cake
Once the cakes are completely cool, slice each cake in half horizontally. You’ll end up with four layers! Place one layer on a serving plate, spread a generous layer of whipped cream, and top it with a handful of drained Morello cherries. Repeat this process with the remaining layers, finishing with a beautiful layer of whipped cream on top.
Step 9: Garnish and Serve
To make your cake look extra special, garnish the top with chocolate shavings and a few more cherries. This adds a touch of elegance and makes it even more tempting. Slice it up and serve it to your family or friends. Get ready for the compliments to roll in!
Tips for Success
- Always measure your ingredients accurately for the best results.
- Let the cakes cool completely before frosting to avoid melting.
- Use a serrated knife for slicing the cakes evenly.
- Chill your mixing bowl and beaters before whipping cream for better volume.
- Feel free to customize with different fruits or flavored extracts!
Equipment Needed
- Two 9-inch round cake pans (or use one 9×13-inch pan for a single-layer cake).
- Mixing bowls (a large one for dry ingredients and a medium one for wet).
- Hand mixer or stand mixer (a whisk works too, but it’ll take longer).
- Measuring cups and spoons for accuracy.
- Wire racks for cooling the cakes.
Variations
- Gluten-Free: Substitute all-purpose flour with a gluten-free flour blend for a delicious gluten-free version.
- Fruit Twist: Add fresh raspberries or strawberries between the layers for a fruity surprise.
- Chocolate Lovers: Use dark chocolate instead of cocoa powder for an even richer flavor.
- Vegan Option: Replace eggs with flax eggs and use plant-based milk and cream alternatives.
- Nutty Delight: Incorporate chopped walnuts or almonds into the batter for added texture and flavor.
Serving Suggestions
- Pair with a scoop of vanilla ice cream for a delightful contrast.
- Serve alongside a cup of freshly brewed coffee or tea to enhance the flavors.
- For a festive touch, add a sprig of mint on top of each slice.
- Present on a beautiful cake stand for an elegant display.
FAQs about Black Forest Cream Cake Recipe
Can I make this Black Forest Cream Cake ahead of time?
Absolutely! This cake can be made a day in advance. Just store it in the refrigerator after assembling. The flavors will meld beautifully overnight, making it even more delicious!
What can I use instead of Morello cherries?
If you can’t find Morello cherries, feel free to use fresh cherries or even frozen ones. Just make sure to drain them well before layering to avoid sogginess.
How do I store leftover cake?
Store any leftover cake in an airtight container in the refrigerator. It should stay fresh for about 3-4 days. Just be sure to keep it covered to maintain that creamy goodness!
Can I freeze the Black Forest Cream Cake?
Yes, you can freeze the cake! Just wrap it tightly in plastic wrap and then in aluminum foil. It can be frozen for up to three months. Thaw it in the fridge before serving.
What’s the best way to slice the cake?
Use a serrated knife for the cleanest cuts. Wipe the knife with a damp cloth between slices to keep the layers looking neat and beautiful!
Final Thoughts
Creating this Black Forest Cream Cake is more than just baking; it’s about crafting memories. Each layer tells a story, from the rich chocolate sponge to the fluffy whipped cream and tart cherries. This cake brings joy to any gathering, making it a centerpiece of celebration. Whether you’re sharing it with family or enjoying a quiet moment with a slice, the flavors will transport you to a place of pure bliss. So, roll up your sleeves, embrace the process, and let this cake be a sweet reminder of the love and happiness that comes from home cooking!

