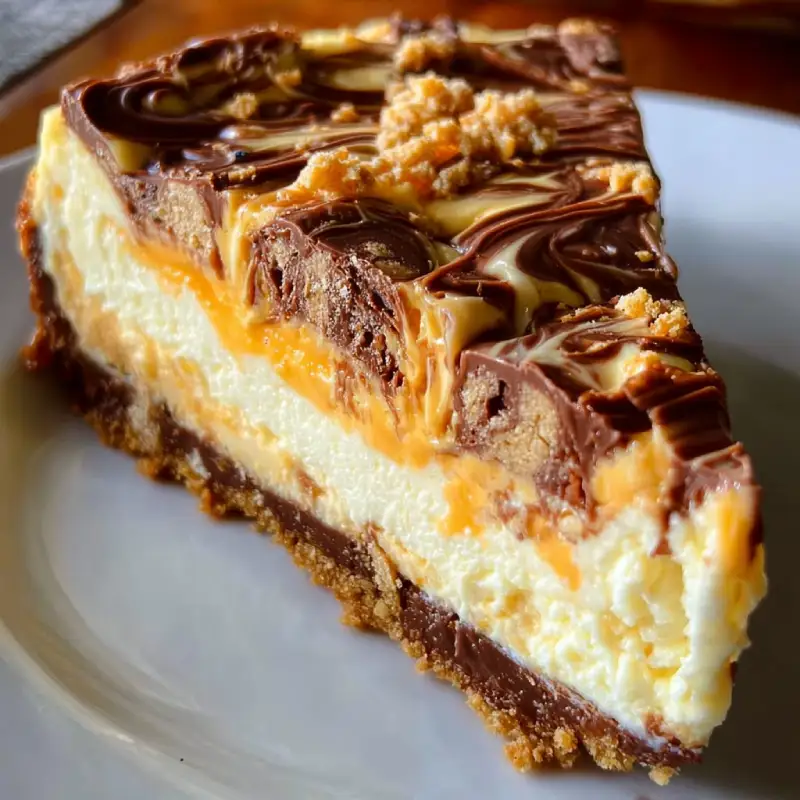
Introduction to Butterfinger Cheesecake Recipe
Hey there, fellow dessert lovers! If you’re anything like me, you know that life can get pretty hectic. Between juggling work, family, and everything in between, finding time to whip up a delightful treat can feel overwhelming. That’s where this Butterfinger cheesecake recipe comes in! It’s a creamy, dreamy dessert that combines the rich flavors of cheesecake with the irresistible crunch of Butterfinger candy. Perfect for impressing guests or simply treating yourself after a long day, this recipe is not just easy; it’s a slice of happiness on a plate!
Why You’ll Love This Butterfinger Cheesecake Recipe
This Butterfinger cheesecake recipe is a game-changer for busy moms and professionals alike. It’s incredibly easy to make, taking just a little over an hour, including baking time. The combination of creamy cheesecake and crunchy Butterfinger creates a flavor explosion that will have everyone asking for seconds. Plus, it’s a fantastic way to indulge without spending all day in the kitchen. Trust me, your taste buds will thank you!
Ingredients for Butterfinger Cheesecake Recipe
Let’s gather our ingredients for this delightful Butterfinger cheesecake recipe! Each component plays a vital role in creating that creamy, crunchy masterpiece. Here’s what you’ll need:
- Graham cracker crumbs: These form the base of our cheesecake crust, providing a sweet and crunchy texture.
- Unsalted butter: Melted butter binds the crumbs together, adding richness to the crust.
- Cream cheese: The star of the show! Softened cream cheese gives the cheesecake its creamy, velvety texture.
- Granulated sugar: This sweetens the filling, balancing the tanginess of the cream cheese.
- Vanilla extract: A splash of vanilla enhances the overall flavor, making it even more delicious.
- Large eggs: Eggs help set the cheesecake, giving it that perfect, smooth consistency.
- Sour cream: This adds a delightful tang and creaminess to the filling, elevating the flavor.
- Butterfinger candy bars: Crushed Butterfinger bars bring that signature crunch and sweet, nutty flavor to the cheesecake.
- Chocolate sauce (optional): Drizzling chocolate sauce on top adds an extra layer of indulgence, but it’s totally optional!
Now, let’s get ready to create this delicious dessert!
How to Make Butterfinger Cheesecake Recipe
Now that we have our ingredients ready, let’s dive into the steps for making this delightful Butterfinger cheesecake! Each step is simple, and I promise you’ll feel like a pro in no time. Let’s get started!
Step 1: Preheat the Oven
First things first, preheat your oven to 325°F (160°C). Preheating is crucial because it ensures that your cheesecake bakes evenly. A hot oven helps set the filling just right, giving you that perfect creamy texture. Trust me, you don’t want to skip this step!
Step 2: Prepare the Crust
In a mixing bowl, combine your graham cracker crumbs and melted butter. Stir until the crumbs are fully coated. This mixture should resemble wet sand. Now, press it firmly into the bottom of a springform pan. Use the back of a measuring cup or your fingers to create an even layer. This crust is the foundation of your cheesecake, so make it sturdy!
Step 3: Make the Cheesecake Filling
In a large mixing bowl, beat the softened cream cheese until it’s smooth and creamy. This is where the magic begins! Gradually add in the granulated sugar and vanilla extract, mixing until well combined. Now, add the eggs one at a time, mixing well after each addition. This helps incorporate air, making your cheesecake light and fluffy.
Step 4: Add Sour Cream and Butterfinger
Next, gently fold in the sour cream and crushed Butterfinger candy bars. The sour cream adds a delightful tang, while the Butterfinger brings that signature crunch and flavor. Make sure everything is well mixed, but don’t overdo it. We want to keep that lovely texture!
Step 5: Bake the Cheesecake
Pour the cheesecake mixture over your prepared crust in the springform pan. Bake it in the preheated oven for 50-60 minutes. You’ll know it’s done when the center is set but still slightly jiggly. Remember, it will continue to firm up as it cools!
Step 6: Cool and Refrigerate
Once baked, remove the cheesecake from the oven and let it cool at room temperature for about an hour. After that, refrigerate it for at least 4 hours, or overnight if you can wait! Chilling is essential for achieving that perfect slice. It allows the flavors to meld beautifully.
Step 7: Serve with Chocolate Sauce
When you’re ready to serve, drizzle some chocolate sauce on top for an extra touch of indulgence. It’s optional, but who can resist a little chocolate? Slice your cheesecake, and watch as everyone’s eyes light up with delight!
Tips for Success
- Always use room temperature cream cheese for a smoother filling.
- Don’t skip the chilling time; it’s key for the best texture.
- For a cleaner slice, use a hot knife to cut through the cheesecake.
- Feel free to customize with more crushed Butterfinger on top!
- Keep an eye on the baking time; every oven is different.
Equipment Needed
- Springform pan: Essential for easy removal of the cheesecake. A regular cake pan works too, but slicing may be trickier.
- Mixing bowls: Use a large bowl for the filling and a smaller one for the crust.
- Electric mixer: A hand mixer or stand mixer makes beating the cream cheese a breeze.
- Measuring cups and spoons: Accurate measurements ensure the best results.
- Spatula: Perfect for folding in ingredients and scraping down the sides of the bowl.
Variations
- Peanut Butter Swirl: Add a swirl of creamy peanut butter to the cheesecake filling for a nutty twist that complements the Butterfinger.
- Chocolate Crust: Use chocolate cookie crumbs instead of graham crackers for a richer, chocolatey base.
- Gluten-Free Option: Substitute graham cracker crumbs with gluten-free cookie crumbs to make this dessert suitable for gluten-sensitive friends.
- Mini Cheesecakes: Pour the batter into muffin tins for individual-sized cheesecakes, perfect for parties or portion control.
- Vegan Version: Use vegan cream cheese and a flaxseed egg substitute to create a dairy-free version of this delicious dessert.
Serving Suggestions
- Pair your Butterfinger cheesecake with a scoop of vanilla ice cream for a delightful contrast.
- Serve with fresh berries like strawberries or raspberries for a pop of color and freshness.
- Enjoy with a cup of coffee or a glass of dessert wine to enhance the flavors.
- Garnish with whipped cream and extra crushed Butterfinger for a stunning presentation.
FAQs about Butterfinger Cheesecake Recipe
As you embark on your Butterfinger cheesecake adventure, you might have a few questions. Don’t worry; I’ve got you covered! Here are some common queries that fellow bakers often ask:
Can I use a different type of candy instead of Butterfinger?
Absolutely! While Butterfinger adds a unique crunch and flavor, you can experiment with other candies like Snickers or Reese’s for a different twist. Just make sure to crush them up like you would with Butterfinger.
How do I know when my cheesecake is done baking?
The key is to look for a slightly jiggly center. It should be set around the edges but still have a little wiggle in the middle. Remember, it will firm up as it cools!
Can I make this cheesecake ahead of time?
Yes! This Butterfinger cheesecake is perfect for making ahead. In fact, chilling it overnight enhances the flavors and texture, making it even more delicious when you serve it.
What’s the best way to store leftovers?
Store any leftover cheesecake in an airtight container in the refrigerator. It should stay fresh for about 3-4 days. Just be sure to keep it covered to prevent it from drying out!
Can I freeze Butterfinger cheesecake?
Yes, you can freeze it! Wrap individual slices tightly in plastic wrap and then place them in a freezer-safe container. It can last up to 2 months in the freezer. Just thaw in the fridge before serving!
Final Thoughts
Creating this Butterfinger cheesecake recipe is more than just baking; it’s about sharing joy and deliciousness with those you love. Each slice is a celebration of creamy cheesecake and crunchy Butterfinger, bringing smiles to faces young and old. Whether it’s a special occasion or a simple weeknight treat, this dessert is sure to impress. Plus, the ease of making it means you can enjoy the process without stress. So, roll up your sleeves, gather your ingredients, and let the sweet aroma fill your kitchen. Trust me, this cheesecake will become a cherished favorite in your home!

