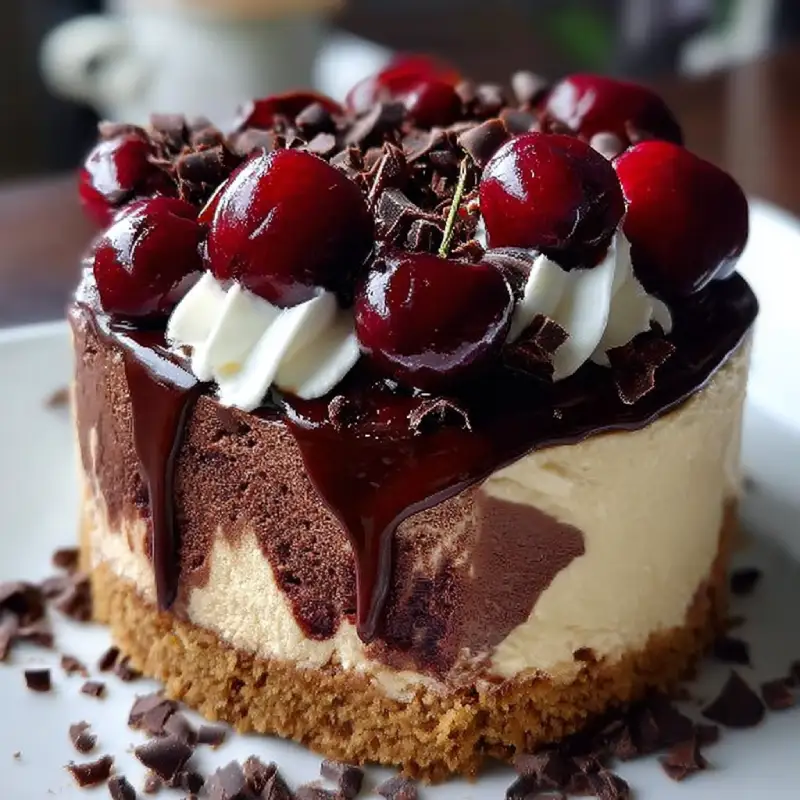
Introduction to Chocolate and Cherry Cheesecake
As a busy mom, I know how precious time can be, especially when it comes to whipping up something special for my family. That’s why I adore this Chocolate and Cherry Cheesecake. It’s a delightful treat that feels indulgent yet is surprisingly easy to make. Imagine a rich, creamy chocolate cheesecake topped with a luscious cherry layer, all coming together in just a few simple steps. Whether you’re celebrating a birthday or just want to impress your loved ones, this dessert is sure to bring smiles and sweet moments to your table.
Why You’ll Love This Chocolate and Cherry Cheesecake
This Chocolate and Cherry Cheesecake is a dream come true for busy cooks like us. It combines rich flavors with minimal effort, making it perfect for any occasion. The creamy texture and sweet cherry topping create a delightful contrast that will have everyone asking for seconds. Plus, it’s a make-ahead dessert, so you can prepare it in advance and enjoy the compliments without the last-minute rush!
Ingredients for Chocolate and Cherry Cheesecake
Gathering the right ingredients is the first step to creating this heavenly Chocolate and Cherry Cheesecake. Here’s what you’ll need:
- Chocolate cookie crumbs: These form the base of your cheesecake. You can use store-bought or crush your favorite chocolate cookies at home for a personal touch.
- Unsalted butter: This helps bind the cookie crumbs together, creating a rich and flavorful crust. Unsalted is best to control the saltiness.
- Cream cheese: The star of the show! Softened cream cheese gives the cheesecake its creamy texture. Make sure it’s at room temperature for easy mixing.
- Granulated sugar: This sweetens the cheesecake, balancing the rich chocolate flavor. You can substitute with a sugar alternative if desired.
- Vanilla extract: A splash of vanilla enhances the overall flavor, adding warmth and depth to the cheesecake.
- Eggs: These are essential for binding the ingredients together and providing structure. Use large eggs for the best results.
- Sour cream: This adds a tangy flavor and creaminess to the filling. You can swap it with Greek yogurt for a lighter option.
- Cherry pie filling: This luscious topping brings a burst of fruity sweetness. You can use homemade cherry filling or store-bought for convenience.
- Cocoa powder: This intensifies the chocolate flavor in the cheesecake. Opt for unsweetened cocoa for the best results.
How to Make Chocolate and Cherry Cheesecake
Now that you have all your ingredients ready, let’s dive into the delightful process of making this Chocolate and Cherry Cheesecake. Follow these simple steps, and you’ll be on your way to creating a dessert that will wow your family and friends!
Step 1: Preheat the Oven
First things first, preheat your oven to 325°F (160°C). Preheating is crucial because it ensures that your cheesecake bakes evenly. A hot oven helps set the cheesecake’s structure, giving it that perfect creamy texture. Trust me, you don’t want to skip this step!
Step 2: Prepare the Crust
In a mixing bowl, combine your chocolate cookie crumbs with the melted butter. Stir until the crumbs are fully coated. This mixture should resemble wet sand. Now, press it firmly into the bottom of a springform pan. Make sure it’s compact; this will create a sturdy base for your cheesecake. A well-pressed crust means no crumbling when you slice into it!
Step 3: Make the Cheesecake Filling
In a large mixing bowl, beat the softened cream cheese until it’s smooth and creamy. This is where the magic begins! Gradually add in the granulated sugar and vanilla extract, mixing until well combined. Then, add the eggs one at a time, ensuring each is fully incorporated before adding the next. The goal here is a silky-smooth batter, so take your time and mix well!
Step 4: Combine Ingredients
Next, stir in the sour cream and cocoa powder. This step adds richness and depth to your cheesecake. Mix until everything is well blended and smooth. Remember, a well-mixed batter is key to a creamy cheesecake. You want to avoid lumps, so take a moment to ensure it’s perfectly combined.
Step 5: Bake the Cheesecake
Pour the cheesecake batter over your prepared crust in the springform pan. Bake it in the preheated oven for 50-60 minutes. Keep an eye on it! The center should be set but still slightly jiggly. This means it will firm up as it cools. If you overbake, you risk a dry cheesecake, and nobody wants that!
Step 6: Cool and Top
Once baked, remove the cheesecake from the oven and let it cool completely at room temperature. This cooling process is essential for the flavors to meld together. After it’s cooled, top it with the cherry pie filling. You can be generous here; the cherries add a beautiful pop of color and sweetness. Chill the cheesecake in the fridge for at least 4 hours before serving for the best results!
Tips for Success
- Always use room temperature cream cheese for a smooth filling.
- Press the crust firmly to prevent it from crumbling when sliced.
- Don’t skip the chilling time; it enhances the flavors and texture.
- For a richer taste, consider using dark chocolate cookies for the crust.
- Garnish with whipped cream and chocolate shavings for an elegant touch.
Equipment Needed
- Springform pan: Essential for easy removal. A regular cake pan works too, but slicing will be trickier.
- Mixing bowls: Use a large bowl for the filling and a smaller one for the crust.
- Electric mixer: A hand mixer is perfect, but a whisk can work if you’re feeling strong!
- Spatula: Great for scraping down the sides and ensuring everything is mixed well.
Variations of Chocolate and Cherry Cheesecake
- Dark Chocolate Delight: Swap regular chocolate cookie crumbs for dark chocolate ones for a richer flavor.
- Nutty Crust: Add crushed nuts like almonds or walnuts to the crust for an extra crunch and flavor.
- Fruit Fusion: Experiment with different fruit toppings like raspberry or blueberry pie filling for a twist.
- Gluten-Free Option: Use gluten-free chocolate cookies for the crust to make this dessert suitable for gluten-sensitive friends.
- Vegan Version: Substitute cream cheese with a vegan cream cheese alternative and use flax eggs for a plant-based treat.
Serving Suggestions for Chocolate and Cherry Cheesecake
- Pair with a dollop of freshly whipped cream for added richness.
- Serve alongside a scoop of vanilla ice cream for a delightful contrast.
- Drizzle with chocolate sauce for an extra indulgent touch.
- Garnish with fresh cherries or mint leaves for a pop of color.
- Enjoy with a cup of coffee or a glass of dessert wine for a perfect ending.
FAQs about Chocolate and Cherry Cheesecake
Can I make Chocolate and Cherry Cheesecake ahead of time?
Absolutely! This cheesecake is perfect for making ahead. Just prepare it a day in advance and let it chill in the fridge. The flavors will deepen, making it even more delicious!
How do I store leftovers?
Store any leftover cheesecake in an airtight container in the refrigerator. It should stay fresh for up to five days. Just be sure to keep it covered to maintain its creamy texture.
Can I freeze Chocolate and Cherry Cheesecake?
Yes, you can freeze it! Wrap individual slices tightly in plastic wrap and then place them in a freezer-safe container. It can last up to three months in the freezer. Just thaw in the fridge before serving.
What can I use instead of cherry pie filling?
If cherries aren’t your thing, feel free to use other fruit toppings like strawberry or blueberry pie filling. You can even make a homemade fruit compote for a fresh twist!
Is this cheesecake suitable for special diets?
Yes! You can easily adapt this Chocolate and Cherry Cheesecake for various diets. Use gluten-free cookies for a gluten-free version or vegan cream cheese for a plant-based treat. The possibilities are endless!
Final Thoughts
Creating this Chocolate and Cherry Cheesecake is more than just baking; it’s about crafting sweet memories with your loved ones. The rich, creamy texture paired with the vibrant cherry topping brings joy to any gathering. I love how this dessert can turn an ordinary day into a celebration. Plus, the smiles on my family’s faces when they take that first bite? Priceless! So, whether it’s a special occasion or just a Tuesday, indulge in this delightful cheesecake. Trust me, it’s a slice of happiness that you and your family deserve!

