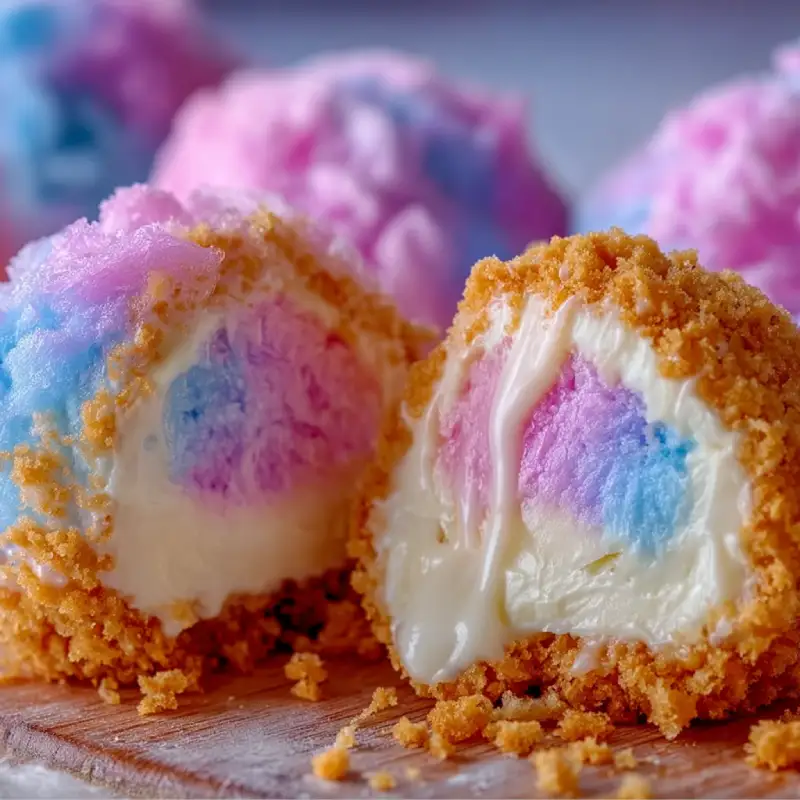
Introduction to Crispy Cotton Candy Cheesecake Bombs Recipe
Hey there, fellow dessert lovers! If you’re looking for a fun and whimsical treat, let me introduce you to my Crispy Cotton Candy Cheesecake Bombs Recipe. This delightful dessert combines the sweet nostalgia of cotton candy with the creamy richness of cheesecake, all wrapped in a crispy shell. Perfect for busy moms like us, these little bites are not only quick to whip up but also guaranteed to impress your loved ones at any gathering. Trust me, they’ll be the star of the show, and you’ll be the hero of the kitchen!
Why You’ll Love This Crispy Cotton Candy Cheesecake Bombs Recipe
Let’s be honest—life can get hectic, and finding time to create something special can feel impossible. That’s where these Crispy Cotton Candy Cheesecake Bombs come in! They’re quick to make, taking just 30 minutes from start to finish. Plus, the combination of flavors is simply irresistible. Your family will adore the sweet, creamy filling and crispy exterior, making these treats perfect for any occasion. Who doesn’t love a little magic in their dessert?
Ingredients for Crispy Cotton Candy Cheesecake Bombs Recipe
Gathering the right ingredients is the first step to creating these delightful treats. Here’s what you’ll need:
- Cotton Candy: The star of the show! Choose your favorite flavor for a fun twist.
- Cream Cheese: This adds that rich, creamy texture. Make sure it’s softened for easy mixing.
- Powdered Sugar: Sweetens the mixture and gives it a smooth finish. You can adjust the amount based on your sweetness preference.
- Vanilla Extract: A splash of this adds depth to the flavor. Pure vanilla is best, but imitation works too.
- Graham Cracker Crumbs: These create the crispy coating. You can crush your own or buy pre-made crumbs for convenience.
- Chocolate Chips: For drizzling on top! Use milk, dark, or even white chocolate to suit your taste.
- Vegetable Oil: Essential for frying. You can substitute with canola or peanut oil if you prefer.
How to Make Crispy Cotton Candy Cheesecake Bombs Recipe
Now that we have our ingredients ready, let’s dive into the fun part—making these Crispy Cotton Candy Cheesecake Bombs! Follow these simple steps, and you’ll have a delightful dessert that’s sure to wow your family and friends.
Step 1: Prepare the Cheesecake Mixture
Start by grabbing a mixing bowl. Add the softened cream cheese, powdered sugar, and vanilla extract. Using a hand mixer or a spatula, blend everything together until it’s smooth and creamy. This is where the magic begins! The mixture should be velvety, with no lumps. If you can’t resist tasting it, I won’t blame you!
Step 2: Incorporate the Cotton Candy
Next, gently fold in the cotton candy. Use a spatula to carefully mix it into the cheesecake mixture. Be gentle here; we want to keep that fluffy texture of the cotton candy intact. The colors will swirl beautifully, creating a dreamy filling that’s as fun to look at as it is to eat!
Step 3: Form and Freeze the Balls
Now it’s time to form the cheesecake mixture into small balls. I like to use a cookie scoop for this—it makes it easy and uniform! Once you’ve shaped the balls, place them on a baking sheet lined with parchment paper. Pop them in the freezer for about 30 minutes. This step is crucial; it helps the balls hold their shape during frying.
Step 4: Coat with Graham Cracker Crumbs
After the balls have frozen, it’s time to coat them. Roll each frozen ball in the graham cracker crumbs until they’re fully covered. This gives them that delightful crunch we all love. Make sure to press the crumbs gently so they stick well. You’ll be amazed at how this simple step transforms the texture!
Step 5: Heat the Oil
In a deep pan, heat the vegetable oil over medium heat. You want it hot enough for frying but not smoking. A good test is to drop a small piece of bread into the oil; if it sizzles, you’re ready to go! This is where the magic happens, so keep an eye on the temperature.
Step 6: Fry the Cheesecake Bombs
Carefully add the coated cheesecake balls to the hot oil, a few at a time. Fry them for about 2-3 minutes, turning occasionally until they’re golden brown. The aroma will be heavenly! Use a slotted spoon to remove them from the oil, letting any excess oil drip off. They should look crispy and inviting!
Step 7: Drain and Drizzle
Once fried, place the cheesecake bombs on paper towels to drain any remaining oil. Now comes the fun part—drizzling with melted chocolate! You can melt the chocolate chips in the microwave or on the stove. Use a spoon or a piping bag to drizzle it over the bombs. This adds a touch of elegance and extra sweetness!
Tips for Success
- Ensure your cream cheese is at room temperature for easy mixing.
- Don’t skip the freezing step; it helps maintain the shape while frying.
- Experiment with different cotton candy flavors for a unique twist.
- Use a thermometer to check oil temperature for perfect frying.
- Let the fried bombs cool slightly before drizzling with chocolate.
Equipment Needed
- Mixing Bowl: A large bowl for combining ingredients. Any size will do!
- Hand Mixer or Spatula: For mixing the cheesecake filling. A whisk works too!
- Cookie Scoop: Helps form uniform balls. You can use your hands if needed.
- Deep Pan: Essential for frying. A heavy-bottomed pot works well too.
- Slotted Spoon: Perfect for removing the bombs from hot oil.
Variations of Crispy Cotton Candy Cheesecake Bombs Recipe
- Flavor Swaps: Try using different flavors of cotton candy, like blue raspberry or bubblegum, for a fun twist.
- Gluten-Free Option: Substitute graham cracker crumbs with gluten-free crumbs or crushed nuts for a gluten-free version.
- Vegan Version: Use vegan cream cheese and a plant-based milk chocolate for a dairy-free treat.
- Mini Bombs: Make smaller balls for bite-sized treats that are perfect for parties or kids.
- Stuffed Bombs: Add a dollop of fruit preserves or chocolate ganache in the center for an extra surprise!
Serving Suggestions for Crispy Cotton Candy Cheesecake Bombs Recipe
- Pair with Ice Cream: Serve these bombs alongside a scoop of vanilla or cotton candy-flavored ice cream for a delightful contrast.
- Fresh Berries: Add a side of fresh strawberries or blueberries for a pop of color and freshness.
- Fun Presentation: Arrange the bombs on a colorful platter and sprinkle with extra graham cracker crumbs for a festive touch.
- Drinks: Serve with a fizzy soda or a fruity punch to complement the sweetness.
FAQs about Crispy Cotton Candy Cheesecake Bombs Recipe
Can I make these Crispy Cotton Candy Cheesecake Bombs ahead of time?
Absolutely! You can prepare the cheesecake mixture and form the balls in advance. Just freeze them until you’re ready to fry. This makes it super convenient for parties or busy weeknights!
What if I can’t find cotton candy?
No worries! You can use flavored marshmallows or even a splash of flavored syrup to mimic that cotton candy taste. Just be creative with what you have on hand!
How do I store leftover cheesecake bombs?
Store any leftovers in an airtight container in the fridge for up to three days. You can also freeze them for longer storage, just reheat in the oven to regain that crispy texture!
Can I bake these instead of frying?
While frying gives them that perfect crispy texture, you can bake them at 350°F for about 15-20 minutes. Just keep an eye on them to ensure they don’t dry out!
What’s the best way to serve these cheesecake bombs?
Serve them warm, drizzled with melted chocolate and a sprinkle of extra graham cracker crumbs. Pair them with a scoop of ice cream for a delightful dessert experience!
Final Thoughts
Creating these Crispy Cotton Candy Cheesecake Bombs is more than just making a dessert; it’s about bringing joy and a touch of whimsy to your kitchen. Each bite is a delightful explosion of flavors that transports you back to carefree carnival days. Whether you’re celebrating a special occasion or simply treating your family, these little bombs are sure to spark smiles and laughter. Plus, they’re a fantastic way to involve your kids in the kitchen! So, roll up your sleeves, embrace the fun, and let these sweet treats become a cherished memory in your home.

