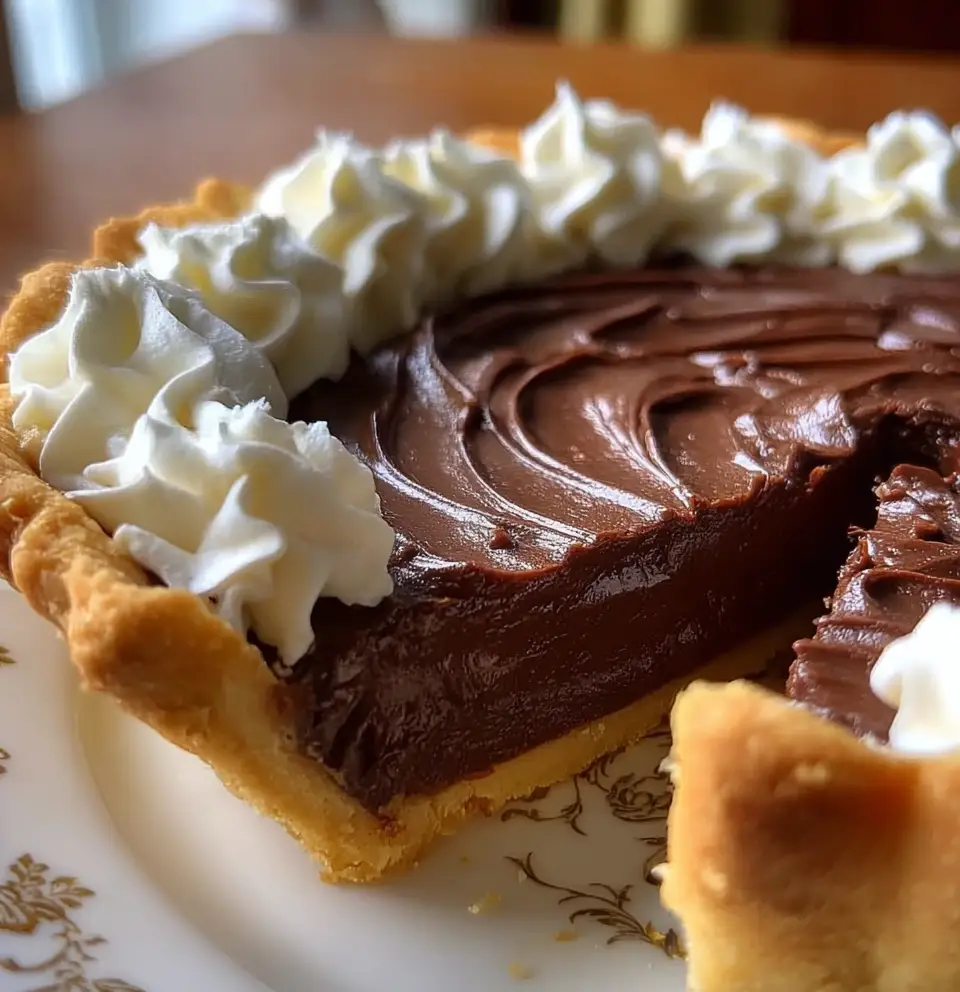
Introduction to Old-Fashioned Chocolate Pie
There’s something magical about an Old-Fashioned Chocolate Pie that brings back sweet memories of family gatherings and cozy evenings. This classic dessert is not just a treat; it’s a slice of nostalgia that can brighten any busy day. Whether you’re looking to impress your loved ones or simply indulge in a creamy delight after dinner, this pie is your go-to solution. With its rich chocolate filling and flaky crust, it’s a dessert that says, “”I care.”” So, let’s dive into this delightful recipe that’s sure to become a cherished favorite in your home!
Why You’ll Love This Old-Fashioned Chocolate Pie
This Old-Fashioned Chocolate Pie is a dream come true for busy moms and professionals alike. It’s quick to whip up, taking just 20 minutes of prep time, and the result is a rich, velvety dessert that will have everyone asking for seconds. Plus, it’s a versatile treat that can be made ahead of time, making it perfect for unexpected guests or a sweet family dinner. Trust me, your taste buds will thank you!
Ingredients for Old-Fashioned Chocolate Pie
Gathering the right ingredients is the first step to creating your Old-Fashioned Chocolate Pie. Here’s what you’ll need:
- 1 pre-made pie crust: A flaky crust is essential for that classic texture. You can use store-bought for convenience or make your own if you’re feeling adventurous.
- 1 cup granulated sugar: This sweetener balances the rich chocolate flavor, making every bite a delight.
- 1/3 cup unsweetened cocoa powder: Choose high-quality cocoa for a deep chocolate taste. Dark chocolate cocoa powder can enhance the flavor even more.
- 1/4 cup cornstarch: This thickening agent gives the filling its creamy consistency, ensuring it sets perfectly.
- 1/4 teaspoon salt: A pinch of salt enhances the sweetness and rounds out the flavors beautifully.
- 2 3/4 cups milk: Whole milk works best for a rich filling, but you can substitute with almond or oat milk for a dairy-free option.
- 3 large egg yolks, beaten: These add richness and help the filling set, creating that luscious texture we all love.
- 2 tablespoons butter: Butter adds a silky finish to the filling, making it even more indulgent.
- 1 teaspoon vanilla extract: This aromatic ingredient elevates the flavor profile, adding warmth and depth.
- Whipped cream for topping (optional): A dollop of whipped cream is the perfect finishing touch, adding a light and airy contrast to the rich pie.
How to Make Old-Fashioned Chocolate Pie
Making an Old-Fashioned Chocolate Pie is a delightful journey that fills your kitchen with the sweet aroma of chocolate. Follow these simple steps, and you’ll have a creamy, dreamy dessert that everyone will love!
Step 1: Preheat the Oven
First things first, preheat your oven to 350°F (175°C). Preheating is crucial because it ensures that your pie crust bakes evenly and gets that perfect golden color. Trust me, a well-baked crust is the foundation of a great pie!
Step 2: Mix Dry Ingredients
In a medium saucepan, combine the granulated sugar, unsweetened cocoa powder, cornstarch, and salt. Whisk them together until they’re well blended. This step is essential for a smooth filling, so take your time to mix thoroughly. No one wants a lumpy pie!
Step 3: Add Milk and Cook
Now, gradually whisk in the milk. Start with a small amount to create a smooth paste, then slowly add the rest. Cook this mixture over medium heat, stirring constantly. You’ll notice it thickening up beautifully. This should take about 5-7 minutes. Keep stirring to avoid any sticking or burning!
Step 4: Temper the Egg Yolks
In a separate bowl, beat the egg yolks. To temper them, take a small amount of the hot chocolate mixture and whisk it into the yolks. This step is crucial to prevent scrambling the eggs. Once combined, pour the yolk mixture back into the saucepan. Stir well to incorporate.
Step 5: Final Cooking Steps
Continue cooking the mixture for another 2 minutes, stirring constantly. This allows the flavors to meld and the filling to thicken even more. Once it’s thickened, remove it from the heat and stir in the butter and vanilla extract. The butter adds a rich creaminess that makes this pie irresistible!
Step 6: Pour into Crust
Carefully pour the luscious chocolate filling into your pre-baked pie crust. Use a spatula to spread it evenly. This is where the magic happens! The filling should look smooth and glossy, promising a delightful treat ahead.
Step 7: Cooling and Refrigeration
Let the pie cool at room temperature for about 30 minutes. Then, cover it and refrigerate for at least 4 hours. This chilling time is essential for the filling to set properly. Patience is key here, but I promise it’s worth the wait!
Step 8: Serve with Whipped Cream
When you’re ready to serve, top each slice with a generous dollop of whipped cream. It adds a light, fluffy contrast to the rich chocolate filling. Your Old-Fashioned Chocolate Pie is now ready to impress!
Tips for Success
- Always whisk constantly when cooking the filling to avoid lumps.
- For a richer flavor, opt for dark chocolate cocoa powder.
- Make the pie a day ahead for a more developed flavor.
- Use a pie shield or foil to prevent the crust from over-browning.
- Let the pie cool completely before refrigerating for best results.
Equipment Needed
- Medium saucepan: A sturdy pot for cooking the filling. A non-stick option works well.
- Whisk: Essential for mixing ingredients smoothly. A fork can work in a pinch.
- Mixing bowl: For beating the egg yolks. Any bowl will do!
- Spatula: Perfect for pouring and spreading the filling evenly.
- Pie dish: A standard 9-inch pie dish is ideal for this recipe.
Variations of Old-Fashioned Chocolate Pie
- Peanut Butter Chocolate Pie: Swirl in some creamy peanut butter into the chocolate filling for a delightful twist.
- Mint Chocolate Pie: Add a few drops of peppermint extract to the filling for a refreshing minty flavor.
- Dairy-Free Option: Substitute the milk with almond or coconut milk and use dairy-free butter for a vegan-friendly dessert.
- Chocolate Hazelnut Pie: Mix in some hazelnut spread for a nutty flavor that pairs beautifully with chocolate.
- Gluten-Free Crust: Use a gluten-free pie crust to make this dessert suitable for those with gluten sensitivities.
Serving Suggestions for Old-Fashioned Chocolate Pie
- Pair with fresh berries for a pop of color and tartness.
- Serve alongside a scoop of vanilla ice cream for extra creaminess.
- Drizzle with chocolate sauce for a decadent touch.
- Enjoy with a cup of coffee or a glass of milk.
- Garnish with chocolate shavings for an elegant presentation.
FAQs about Old-Fashioned Chocolate Pie
Can I use a homemade pie crust instead of a pre-made one?
Absolutely! A homemade pie crust can add a personal touch to your Old-Fashioned Chocolate Pie. Just make sure it’s fully baked before adding the filling for the best results.
How do I store leftovers?
Store any leftover pie in the refrigerator, covered with plastic wrap or in an airtight container. It should stay fresh for up to 3 days, but I doubt it will last that long!
Can I freeze Old-Fashioned Chocolate Pie?
Yes, you can freeze the pie! Just make sure it’s completely cooled and wrapped tightly. It can be frozen for up to 2 months. Thaw it in the fridge before serving.
What can I substitute for cornstarch?
If you don’t have cornstarch, you can use all-purpose flour as a thickening agent. Just use about 1/3 cup of flour instead of 1/4 cup of cornstarch.
Is this pie suitable for special diets?
This Old-Fashioned Chocolate Pie can be adapted for various diets. Use dairy-free milk and butter for a vegan option, and a gluten-free crust for those with gluten sensitivities. Enjoy!
Final Thoughts
Creating an Old-Fashioned Chocolate Pie is more than just baking; it’s about crafting sweet memories in your kitchen. The rich, creamy filling paired with a flaky crust is a delightful treat that brings smiles to faces young and old. Whether it’s a family gathering or a quiet evening at home, this pie adds a touch of warmth and love to any occasion. So, roll up your sleeves, embrace the joy of baking, and let this classic dessert become a cherished part of your culinary adventures. Trust me, every slice is a celebration of life’s sweetest moments!

