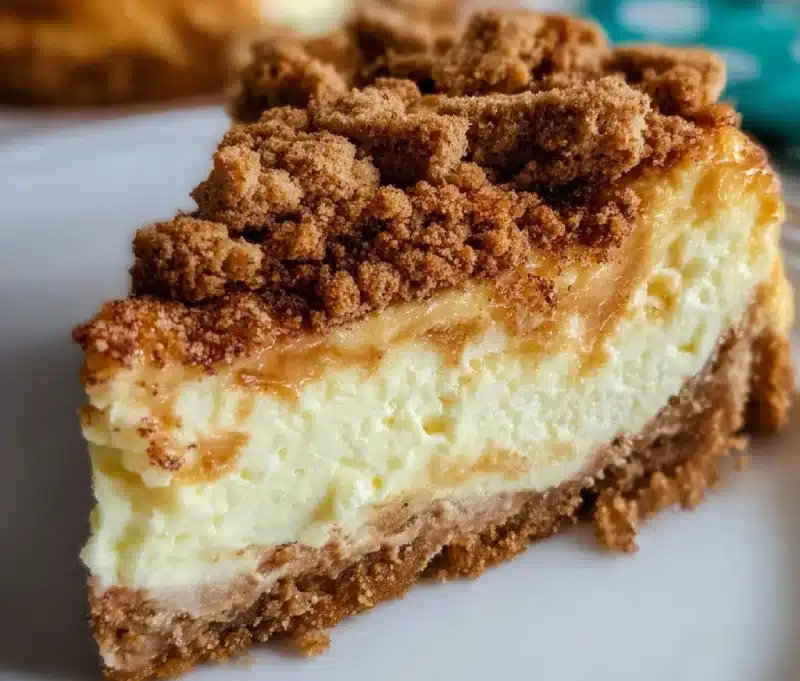
Introduction to Snickerdoodle Cheesecake
As a busy mom, I know how precious time can be, especially when it comes to whipping up something sweet. That’s why I’m excited to share my Snickerdoodle Cheesecake recipe with you! This delightful dessert combines the creamy goodness of cheesecake with the warm, comforting flavors of cinnamon and sugar, just like the classic snickerdoodle cookie. It’s perfect for impressing guests or simply treating yourself after a long day. Trust me, this recipe is a quick solution for those moments when you crave something special without spending hours in the kitchen!
Why You’ll Love This Snickerdoodle Cheesecake
This Snickerdoodle Cheesecake is a game-changer for busy lives! It’s incredibly easy to make, requiring just a handful of ingredients and minimal prep time. The creamy texture paired with that delightful cinnamon-sugar twist will have your taste buds dancing. Plus, it’s a crowd-pleaser, making it perfect for family gatherings or cozy nights in. You’ll love how it brings smiles without the stress of complicated baking!
Ingredients for Snickerdoodle Cheesecake
Gathering the right ingredients is the first step to creating your Snickerdoodle Cheesecake masterpiece. Here’s what you’ll need:
- 1 ½ cups graham cracker crumbs: These form the delicious crust. You can use store-bought or crush your own for a fresher taste.
- ½ cup unsalted butter, melted: This binds the crumbs together and adds richness. Unsalted is best to control the saltiness.
- 2 cups cream cheese, softened: The star of the show! It gives the cheesecake its creamy texture. Make sure it’s at room temperature for easy mixing.
- 1 cup granulated sugar: This sweetens the cheesecake. You can substitute with a sugar alternative if you prefer.
- 1 teaspoon vanilla extract: Adds a lovely depth of flavor. Pure vanilla is always a great choice!
- 3 large eggs: These help set the cheesecake. Room temperature eggs mix better, so take them out ahead of time.
- 1 teaspoon ground cinnamon: This is where the snickerdoodle magic happens! Feel free to add more if you love cinnamon.
- ½ cup sour cream: This adds creaminess and a slight tang. Greek yogurt can be a good substitute if you’re out of sour cream.
- ¼ cup all-purpose flour: This helps stabilize the cheesecake. You can use gluten-free flour if needed.
- 1 tablespoon cinnamon-sugar mixture (for topping): A sprinkle of this on top before serving adds that final touch of sweetness and spice.
How to Make Snickerdoodle Cheesecake
Now that you have your ingredients ready, let’s dive into the fun part—making your Snickerdoodle Cheesecake! Follow these simple steps, and you’ll have a delicious dessert that’s sure to impress.
Step 1: Preheat the Oven
First things first, preheat your oven to 325°F (163°C). Preheating is crucial because it ensures even baking. If you skip this step, your cheesecake might not set properly, and nobody wants a gooey mess!
Step 2: Prepare the Crust
In a mixing bowl, combine the graham cracker crumbs and melted butter. Stir until the crumbs are fully coated. This mixture should resemble wet sand. Now, press it firmly into the bottom of your springform pan. A solid crust is key to holding your cheesecake together, so don’t be shy—use the back of a measuring cup to pack it down well!
Step 3: Make the Cheesecake Filling
In a large mixing bowl, beat the softened cream cheese and granulated sugar together until smooth. This step is essential for a creamy texture. You want to eliminate any lumps, so take your time. Once it’s nice and fluffy, add in the vanilla extract, eggs, and ground cinnamon. Mix until everything is well combined and silky.
Step 4: Combine Ingredients
Next, stir in the sour cream and flour. It’s important to add these last to keep the mixture light and airy. Mix gently until just combined. Overmixing can lead to cracks in your cheesecake, so be careful here!
Step 5: Pour and Bake
Now, pour the cheesecake batter over your prepared crust. Spread it evenly with a spatula. Bake in the preheated oven for 50-60 minutes. The center should be set but still slightly jiggly. To check for doneness, gently shake the pan. If the edges are firm and the center has a little wiggle, you’re good to go!
Step 6: Cool and Serve
Once baked, remove the cheesecake from the oven and let it cool in the pan for about an hour. This cooling time helps prevent cracks. After it’s cooled, sprinkle the cinnamon-sugar mixture on top for that signature snickerdoodle flavor. For the best taste, refrigerate the cheesecake overnight before serving. Trust me, it’s worth the wait!
Tips for Success
- Always use room temperature ingredients for a smoother batter.
- Don’t skip the cooling time; it helps prevent cracks in your cheesecake.
- For a creamier texture, beat the cream cheese thoroughly to eliminate lumps.
- Use a water bath for even baking if you want to go the extra mile.
- Feel free to experiment with spices—add nutmeg or ginger for a twist!
Equipment Needed
- Springform pan: Essential for easy removal. A regular cake pan works too, but it may be trickier to serve.
- Mixing bowls: Use a large bowl for the filling and a smaller one for the crust.
- Electric mixer: A hand mixer or stand mixer makes blending easier, but a whisk works in a pinch.
- Spatula: Perfect for spreading the batter evenly.
- Measuring cups and spoons: Accurate measurements are key to success!
Variations of Snickerdoodle Cheesecake
- Chocolate Snickerdoodle Cheesecake: Add ½ cup of cocoa powder to the batter for a rich chocolate twist.
- Gluten-Free Option: Substitute graham cracker crumbs with gluten-free cookies and use gluten-free flour in the filling.
- Mini Snickerdoodle Cheesecakes: Use a muffin tin to create individual servings. Adjust baking time to about 20-25 minutes.
- Caramel Swirl: Drizzle caramel sauce into the batter before baking for a sweet surprise.
- Vegan Snickerdoodle Cheesecake: Replace cream cheese with cashew cream and use flax eggs for a plant-based version.
Serving Suggestions for Snickerdoodle Cheesecake
- Whipped Cream: A dollop of freshly whipped cream adds a light touch and complements the cheesecake beautifully.
- Cinnamon Sticks: Use cinnamon sticks as a garnish for a rustic presentation and extra flavor.
- Hot Coffee: Pair with a warm cup of coffee or chai tea for a cozy dessert experience.
- Fresh Berries: Serve with a side of fresh berries for a pop of color and freshness.
- Chocolate Drizzle: A drizzle of chocolate sauce can elevate the dessert to a whole new level!
FAQs about Snickerdoodle Cheesecake
Can I make Snickerdoodle Cheesecake ahead of time?
Absolutely! In fact, making it a day in advance enhances the flavors. Just refrigerate it overnight, and it’ll be ready to impress your guests the next day.
What can I use instead of cream cheese?
If you’re looking for a lighter option, you can use Greek yogurt or a vegan cream cheese alternative. Just keep in mind that the texture may vary slightly.
How do I store leftover Snickerdoodle Cheesecake?
Store any leftovers in an airtight container in the refrigerator. It should stay fresh for about 4-5 days, but I doubt it’ll last that long!
Can I freeze Snickerdoodle Cheesecake?
Yes, you can freeze it! Wrap individual slices tightly in plastic wrap and then place them in a freezer-safe container. It can last up to 2 months in the freezer.
What’s the best way to serve Snickerdoodle Cheesecake?
For a delightful presentation, serve it chilled with a dollop of whipped cream and a sprinkle of cinnamon-sugar on top. It’s a treat that looks as good as it tastes!
Final Thoughts
Creating this Snickerdoodle Cheesecake is more than just baking; it’s about sharing joy and warmth with those you love. The creamy texture and cinnamon-sugar flavor transport you to cozy moments, whether it’s a family gathering or a quiet evening at home. I cherish the smiles it brings to my family’s faces, and I know you will too. This recipe is a reminder that even on the busiest days, a little sweetness can make everything better. So, roll up your sleeves, embrace the process, and enjoy every delicious bite of this delightful cheesecake!

