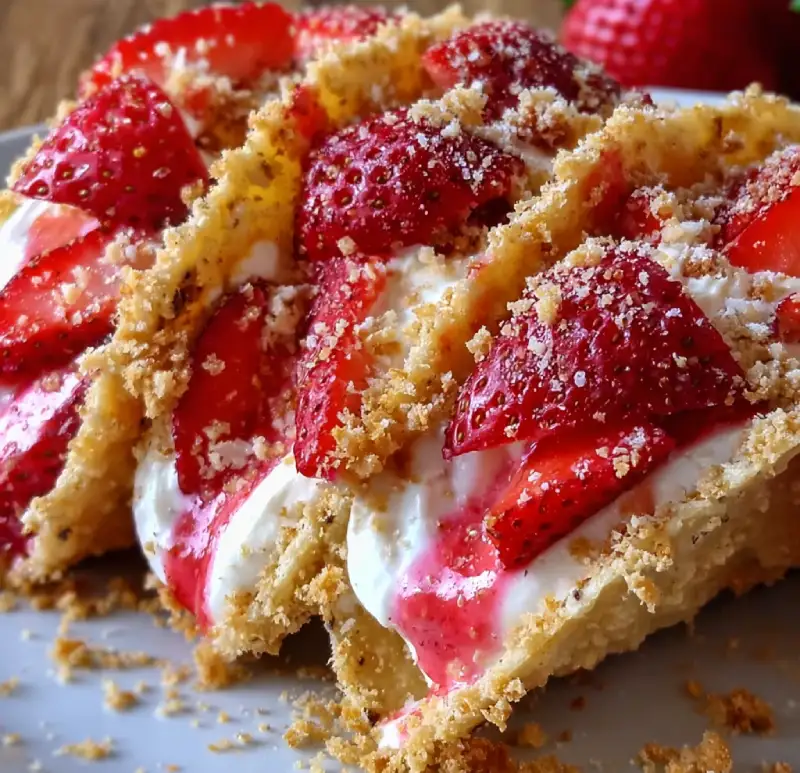
Introduction to Strawberry Crunch Cheesecake Tacos
Hey there, fellow dessert lovers! If you’re looking for a sweet treat that’s as fun to make as it is to eat, let me introduce you to Strawberry Crunch Cheesecake Tacos. These delightful little tacos are a perfect solution for busy days when you want to impress your loved ones without spending hours in the kitchen. With creamy cheesecake, fresh strawberries, and a crunchy topping, they’re sure to bring smiles all around. Plus, they’re no-bake, making them a breeze to whip up. Trust me, you’ll want to keep this recipe close at hand!
Why You’ll Love This Strawberry Crunch Cheesecake Tacos
These Strawberry Crunch Cheesecake Tacos are a game-changer for busy moms and professionals alike. They come together in just 30 minutes, making them a quick and delightful dessert option. The combination of creamy cheesecake and fresh strawberries is simply irresistible. Plus, the crunchy topping adds a fun texture that everyone will love. You’ll find yourself making these again and again, and your family will thank you for it!
Ingredients for Strawberry Crunch Cheesecake Tacos
Gathering the right ingredients is the first step to creating these delightful Strawberry Crunch Cheesecake Tacos. Here’s what you’ll need:
- Taco-shaped cookies: These serve as the fun, edible shell for your cheesecake filling. You can find them in most grocery stores or online.
- Cream cheese: The star of the show! Softened cream cheese gives the cheesecake its rich and creamy texture. Make sure it’s at room temperature for easy mixing.
- Powdered sugar: This sweetener adds just the right amount of sweetness to balance the tanginess of the cream cheese.
- Vanilla extract: A splash of vanilla enhances the flavor, making the cheesecake taste even more delightful.
- Whipped cream: Light and airy, whipped cream adds volume and a fluffy texture to the cheesecake mixture.
- Fresh strawberries: Diced strawberries bring a burst of freshness and color to your tacos. Feel free to use other berries if you prefer!
- Crushed graham crackers: These create the crunchy topping that adds texture and a hint of sweetness.
- Melted butter: This binds the crushed graham crackers together, making the topping easy to sprinkle over your tacos.
For those looking to mix things up, consider adding a bit of strawberry puree to the cheesecake mixture for an extra fruity kick. You can also substitute other fruits like blueberries or raspberries if strawberries aren’t your favorite. !
How to Make Strawberry Crunch Cheesecake Tacos
Step 1: Prepare the Cheesecake Mixture
Let’s kick things off by making the cheesecake mixture. In a mixing bowl, beat the softened cream cheese until it’s smooth and creamy. This is where the magic begins! Next, add in the powdered sugar and vanilla extract. Mix everything together until it’s well combined. You want a luscious, velvety texture that will make your taste buds dance. Trust me, this step is crucial for that rich cheesecake flavor. Once it’s all blended, you’re ready to move on to the next step!
Step 2: Fold in the Whipped Cream
Now comes the fun part—folding in the whipped cream! This step is essential for keeping your cheesecake light and fluffy. Gently add the whipped cream to your cream cheese mixture. Use a spatula to fold it in, being careful not to deflate the airiness. Think of it as a delicate dance; you want to keep that volume intact. The result will be a dreamy, cloud-like filling that’s simply irresistible. You’re almost there!
Step 3: Create the Crunchy Topping
Let’s add some crunch to our tacos! In a separate bowl, combine the crushed graham crackers with melted butter. Mix them together until the crumbs are evenly coated. This mixture will create a delightful topping that adds texture to your Strawberry Crunch Cheesecake Tacos. It’s like the cherry on top, but crunchier! Once it’s ready, set it aside for the assembly. You’re just a few steps away from dessert bliss!
Step 4: Assemble the Tacos
It’s time to bring everything together! Take your taco-shaped cookies and fill each one with the cheesecake mixture. Don’t be shy—load them up! Next, sprinkle the diced strawberries on top. This adds a burst of freshness that complements the creamy filling perfectly. Finally, finish off by sprinkling the crunchy graham cracker mixture over each taco. It’s a beautiful sight, and I promise, your family will be drooling at this point!
Step 5: Chill and Serve
Before you dive in, let’s chill those tacos! Place them in the refrigerator for at least 30 minutes. This step is crucial for achieving the best texture. Chilling allows the flavors to meld together and the filling to set. When you’re ready to serve, just pull them out and watch the smiles appear. These Strawberry Crunch Cheesecake Tacos are not just a treat; they’re a celebration of flavor and fun!
Tips for Success
- Make sure your cream cheese is softened for easy mixing.
- Gently fold in the whipped cream to keep the mixture light and airy.
- Chill the tacos for at least 30 minutes to enhance the flavors.
- Feel free to customize with your favorite fruits for a unique twist.
- Use a piping bag for a neat filling if you want to impress!
Equipment Needed
- Mixing bowl: A large bowl for combining ingredients. A sturdy plastic or glass bowl works well.
- Electric mixer: For beating the cream cheese. A whisk can work, but it’ll take more effort!
- Spatula: Essential for folding in the whipped cream gently.
- Measuring cups: To ensure accurate ingredient amounts. You can use any standard measuring cups.
- Refrigerator: For chilling the tacos. A cooler can work in a pinch!
Variations
- Chocolate Lovers: Swap out some of the cream cheese for chocolate cream cheese for a rich twist.
- Nutty Crunch: Add chopped nuts like almonds or pecans to the graham cracker topping for extra crunch.
- Vegan Option: Use vegan cream cheese and coconut whipped cream for a plant-based version.
- Berry Medley: Mix in other berries like blueberries or raspberries for a colorful and flavorful mix.
- Gluten-Free: Use gluten-free taco-shaped cookies and graham crackers to make this dessert suitable for gluten-sensitive friends.
Serving Suggestions
- Pair with a scoop of vanilla ice cream for an extra indulgent treat.
- Serve alongside a refreshing fruit salad to balance the sweetness.
- Drizzle with chocolate or caramel sauce for a decadent touch.
- Garnish with mint leaves for a pop of color and freshness.
- Present on a colorful platter to make your dessert table shine!
FAQs about Strawberry Crunch Cheesecake Tacos
Can I make Strawberry Crunch Cheesecake Tacos in advance?
Absolutely! These delightful tacos can be made a few hours ahead of time. Just assemble them and chill in the refrigerator until you’re ready to serve. This makes them a perfect dessert for busy days or gatherings!
What can I substitute for strawberries?
If strawberries aren’t your favorite, feel free to swap them out! Blueberries, raspberries, or even diced peaches work beautifully. The key is to use fresh fruit that complements the creamy cheesecake filling.
How long do these tacos last in the fridge?
Once assembled, Strawberry Crunch Cheesecake Tacos can be stored in the refrigerator for up to two days. Just make sure to cover them to keep them fresh and prevent them from drying out.
Can I freeze these tacos?
While I recommend enjoying them fresh, you can freeze the cheesecake mixture separately from the taco shells. Just thaw and assemble when you’re ready to indulge!
What’s the best way to serve these tacos?
For a fun presentation, serve them on a colorful platter with extra strawberries on the side. You can also drizzle some chocolate or caramel sauce over the top for an extra touch of sweetness!
Final Thoughts
Creating Strawberry Crunch Cheesecake Tacos is more than just making a dessert; it’s about bringing joy to your kitchen and smiles to your family’s faces. The delightful combination of creamy cheesecake, fresh strawberries, and that irresistible crunch makes every bite a celebration. Whether it’s a busy weeknight or a special occasion, these tacos are a sweet reminder that dessert can be both fun and easy. So, roll up your sleeves, gather your loved ones, and dive into this delicious adventure. Trust me, once you make these, they’ll become a cherished favorite in your home!

